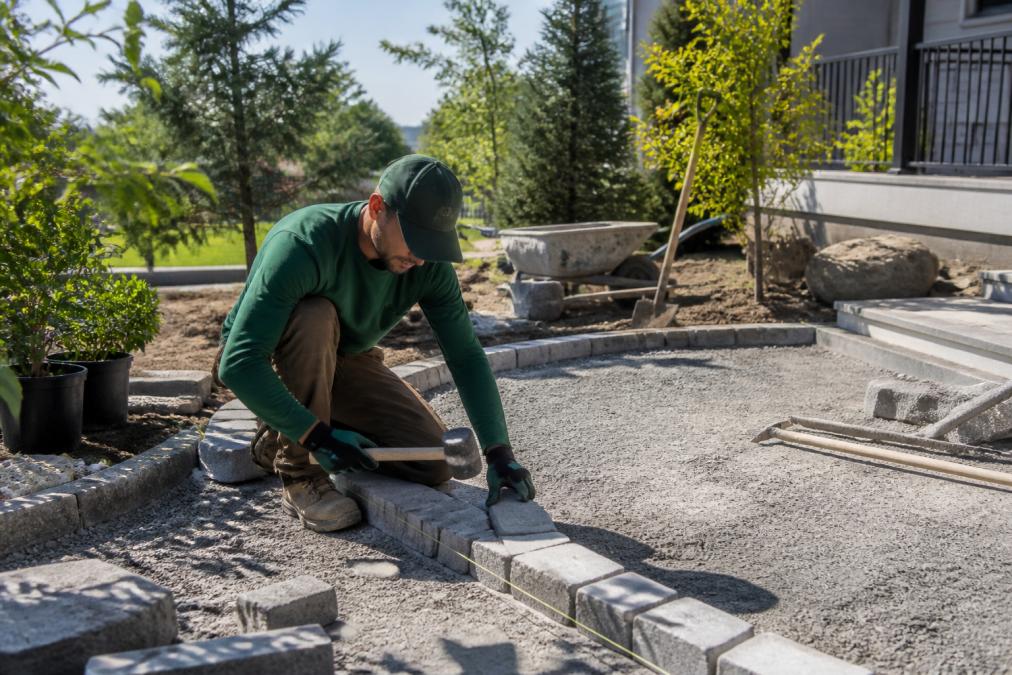
 ultimate-guide
Best Practices for Landscape Design Installation
Table of Contents
- Start With a Landscape Site Analysis and a Real Plan
- Landscape Site Preparation Steps That Prevent Callbacks
- Essential Tools for Landscape Construction
- Landscape Drainage Best Practices for Wet Yards
- Hardscaping and Planting: Where Most Landscape Design Installation Goes Wrong
- A Realistic Residential Landscape Installation Timeline
- Permits, Contractor Selection, and the Maintenance Schedule Nobody Plans For
- Frequently Asked Questions
Last Updated: September 12, 2026
Start With a Landscape Site Analysis and a Real Plan
Landscape design installation is the process of turning a drawn plan into a built, functioning outdoor space, and it starts long before anyone lifts a shovel. At Ward's Lawn Care & Landscape Co., we've handled residential and commercial installations since 1986, and the projects that go smoothly are almost always the ones with the most unglamorous prep work behind them. A site analysis is the first step: a walkthrough that documents sun exposure, slope, existing drainage patterns, soil composition, and how people actually move through the yard. Skip it and you're designing for a yard that doesn't exist.
The EPA WaterSense landscaping guidance makes the same point from a water-use angle: plant selection and irrigation decisions only work when they match the site's real conditions.
What a Site Analysis Actually Checks
A proper site analysis answers a short list of questions before design begins:
- Where does water pool after heavy rain, and where does it leave the property?
- How many hours of direct sun does each zone get, and when?
- What's the existing soil composition, and how compacted is it from construction?
- Where are utilities, septic fields, and root zones of mature trees?
- How does the topography slope toward or away from the house?
Design Principles That Decide How the Yard Feels
Good residential landscape design rests on four principles: unity, balance, scale, and focal point. Unity means materials and plant palettes repeat instead of competing. Balance means visual weight is distributed, symmetrically or asymmetrically. Scale means a plant's mature size fits the space, not just its nursery size. And a focal point, a specimen tree, a fire feature, a well-placed boulder, gives the eye somewhere to land. Get these four right and even a modest budget looks intentional.
Landscape Site Preparation Steps That Prevent Callbacks
Landscape site preparation steps are where projects are won or lost, and they're the part homeowners never see. A common mistake is treating prep as a formality and jumping straight to planting. The consequence shows up a season later as settling pavers, drowned perennials, and callbacks.
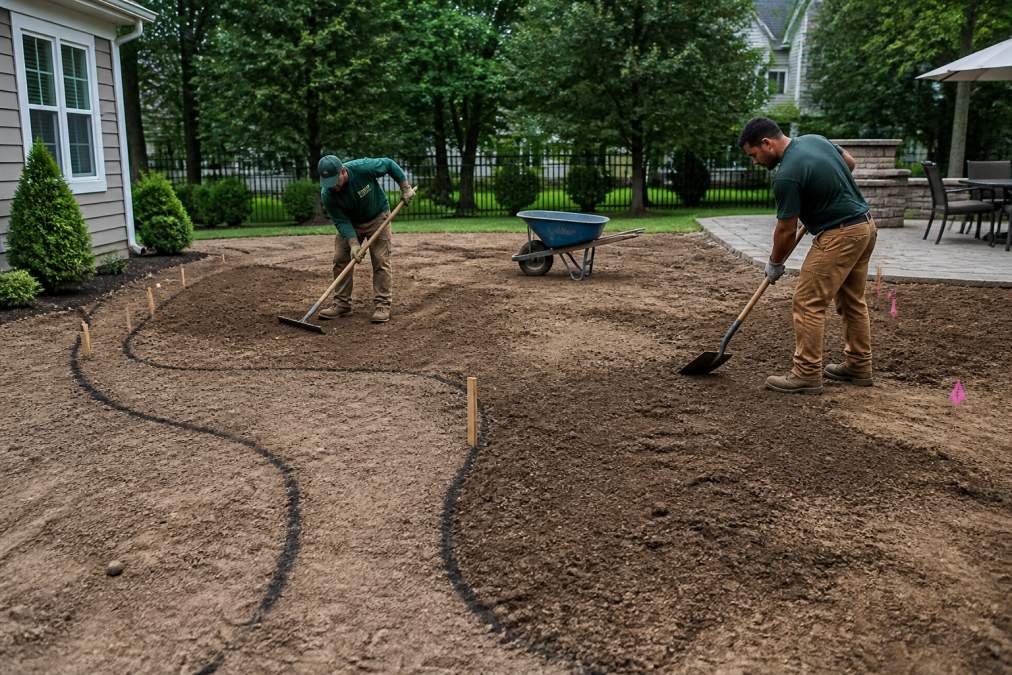
Grading, Soil, and Bed Layout
Grading establishes the finished slope that moves water away from the foundation, typically a gentle fall of roughly 2 percent over the first several feet (fema.gov). Soil preparation follows: testing composition, tilling compacted zones, and amending with organic matter so roots can establish. Bed layout comes last, and it should be marked and walked before anything is planted. What most guides miss is that bed lines drawn on paper rarely match how the space feels on foot. Mark them, stand back, and adjust before you cut.
Essential Tools for Landscape Construction
Essential tools for landscape construction fall into four groups: digging and grading (spades, mattocks, grading rakes), compaction and plate equipment for hardscape bases, cutting tools for stone and timber, and layout tools like string lines, stakes, and a spirit level. For residential work, a plate compactor and a laser or water level are the two items that separate a professional-looking install from a wavy one.
What most guides skip is the rent-versus-buy math. A plate compactor rents for roughly $60 to $100 per day at most equipment yards, which is almost always cheaper than buying one for a single patio project. A laser level, by contrast, is worth owning if you plan more than one hardscape job. Hand tools, spades, mattocks, grading rakes, hand tampers, are inexpensive enough to buy outright and keep. Wet saws for cutting pavers and stone sit in the middle: rent for a weekend project, buy only if you are cutting on multiple jobs.
Safety Gear and Site Protection
The tools list is incomplete without the safety and site-protection items that prevent injuries and expensive rework. At minimum: safety glasses and hearing protection when running a plate compactor or wet saw, work gloves, steel-toe boots, and a dust mask when cutting stone or concrete. Before any digging, call 811 to have underground utilities marked, this is free in every state and required by law in most. Skipping that call is the single fastest way to turn a weekend project into a six-figure repair bill.
Site protection matters too. Landscape fabric or tarps under stockpiles keep gravel and soil out of the lawn, and plywood sheets protect driveways from heavy equipment and pallet deliveries.
Design and Estimation Software
A second category matters just as much: design and estimation software. Apps like iScape let homeowners visualize changes on their own photos before committing, while professional platforms such as ProScape AI and Structure Studios (VizTerra) handle estimation and 3D rendering for larger builds. Houzz Pro bundles project management with design for contractors running multiple jobs. None of these replace a site analysis, but they shorten the gap between what a client imagines and what gets built.
| Tool Category | Examples | Primary Use | Buy or Rent |
|---|---|---|---|
| Digging and grading | Spades, mattocks, grading rakes | Bed prep, soil shaping | Buy |
| Compaction | Plate compactor, hand tamper | Paver and patio bases | Rent (compactor), buy (tamper) |
| Cutting | Wet saw, pruning saw | Stone, timber, roots | Rent (wet saw), buy (pruning saw) |
| Layout | String line, stakes, level | Grades, straight lines | Buy |
| Safety | Glasses, gloves, dust mask, boots | Injury and dust protection | Buy |
| Design software | iScape, VizTerra, Houzz Pro | Visualization, estimates | Subscription |
Landscape Drainage Best Practices for Wet Yards
Landscape drainage best practices start with one rule: move water away from the structure before you do anything decorative. Surface grading handles most residential problems. Where grading alone won't work, French drains, dry creek beds, and channel drains redirect flow to a safe discharge point. Erosion control follows the same logic: mulch, groundcover, and retaining walls hold soil in place on slopes instead of letting it wash into the street.
Hardscaping and Planting: Where Most Landscape Design Installation Goes Wrong
Most landscape design installation failures trace back to two decisions made too fast: base preparation under hardscape and spacing at planting time. Patios, walkways, and retaining walls all live or die on their base. A paver patio needs several inches of compacted gravel beneath it, not just sand. Retaining walls need proper base depth and, above a certain height, engineering. Cut that corner and the wall leans within two winters.
Plant Spacing, Native Plants, and Hardiness Zone
Plant spacing should be based on mature size, not the size in the pot. The instinct to fill every gap immediately is why so many beds look overcrowded by year three. Native plants and hardiness-zone-appropriate selections reduce irrigation needs and disease pressure, which is the core idea behind xeriscaping and sustainable design. The USDA Plant Hardiness Zone Map is the reference point for what will actually survive your winters.
A Realistic Residential Landscape Installation Timeline
A residential landscape installation timeline typically runs four to eight weeks for a full yard, depending on scope and weather. But the range alone is not useful, what homeowners actually need is a phase-by-phase breakdown so they can plan around deliveries, inspections, and weather windows.
| Phase | Typical Duration | What Happens |
|---|---|---|
| Site analysis and design | 1-2 weeks | Walkthrough, measurements, plan revisions |
| Permitting (if required) | 1-4 weeks | Submittal, review, possible revisions |
| Site preparation | 3-7 days | Grading, soil amendment, bed layout |
| Hardscape installation | 2-4 weeks | Base prep, compaction, pavers, walls |
| Planting and irrigation | 3-5 days | Plant placement, mulch, drip lines |
| Final walkthrough | 1 day | Punch list, care instructions |
What Actually Pushes a Timeline
Weather, permitting, and material lead times are the variables that push timelines, not labor. Rain days during grading or hardscape base work can add a week or more because compacted subgrade has to dry before the next lift goes down. Permitting is the most underestimated delay: many municipalities take two to four weeks for a retaining wall or structural hardscape review, and that clock starts only after a complete submittal. Material lead times matter too, natural stone, custom pavers, and large specimen trees are often special-order items with two- to six-week lead times.
Weather Windows by Season
Installation timing changes what is realistic. Spring and fall are the most forgiving windows for planting because soil temperatures support root establishment and irrigation demand is lower. Summer installs are possible but require more frequent watering during the first weeks. Late-fall and winter installs are best limited to hardscape and grading, since frozen ground makes planting and soil amendment impractical.
First-Year Maintenance Schedule
The timeline does not end at the final walkthrough. New installations need more attention in year one than established landscapes. A simple seasonal schedule keeps the investment intact:
- Spring: Refresh mulch to a 2- to 3-inch depth, check irrigation emitters, prune winter damage.
- Summer: Water deeply and less often to encourage deep roots; monitor for heat stress on new plantings.
- Fall: Aerate and overseed turf if needed, cut back perennials, plant bulbs and cool-season additions.
- Winter: Protect tender plants, avoid walking on frozen turf, plan next year's phase.
Ward's Lawn Care & Landscape Co. builds that first-year care into the handoff, so the yard you paid for still looks like the plan a year later.
Permits, Contractor Selection, and the Maintenance Schedule Nobody Plans For
Permitting and legal compliance are the two topics most installation guides skip entirely. Many municipalities require permits for retaining walls above a certain height, structural hardscape, and any change to drainage that affects neighboring properties. Check local requirements before breaking ground; retroactive permits are far more expensive than upfront ones.
Choosing between DIY and a professional contractor comes down to a simple matrix:
| Factor | DIY Makes Sense | Hire a Pro |
|---|---|---|
| Scope | Planting beds, mulch | Grading, retaining walls, drainage |
| Equipment | Hand tools only | Compaction, excavation needed |
| Permits | None required | Structural or drainage changes |
| Timeline | Flexible, multi-season | Fixed deadline |
| Risk tolerance | Low-cost mistakes | High-cost failures possible |
Then there's the maintenance schedule nobody plans for. New installations need more attention in year one than established landscapes: watering frequency, mulch refresh, and pruning timing all matter more while roots establish. Ward's Lawn Care & Landscape Co. builds that first-year care into the handoff, so the yard you paid for still looks like the plan a year later.
A landscape installation is only as good as the prep, drainage, and follow-through behind it, and those are exactly the parts that are hardest to judge from a finished photo. Ward's Lawn Care & Landscape Co. handles the full scope, from site analysis and grading through hardscape, planting, and the first-year maintenance schedule that keeps it looking right. With free estimates, full-service outdoor maintenance, and technicians who've been doing this work since 1986, we make the process predictable from the first walkthrough to the final walkthrough. Contact Us to start with a site assessment and a plan built for your yard.
Frequently Asked Questions
What are the fundamental principles of landscape design?
The core principles are unity, balance, scale, and focal point. Unity means the yard reads as one coordinated space rather than disconnected projects. Balance covers visual weight on each side of a main view line. Scale keeps plant sizes and hardscape proportions matched to the house and lot. A focal point, such as a specimen tree or a seating area, gives the eye somewhere to land. These principles guide plant selection, hardscape layout, and how the finished landscape design installation looks from the street and from inside the home.
How do you prepare a site for landscape installation?
Site preparation starts with a site analysis: checking topography, soil composition, drainage patterns, sun exposure, and any utility lines. From there, crews clear debris, rough grade the soil away from the foundation, till and amend compacted areas, and mark bed lines and hardscape footprints. Skipping grading or soil amendment is one of the most common installation mistakes and often shows up later as settling patios or struggling plants. Proper landscape site preparation steps take time but prevent expensive rework.
How do you ensure proper drainage during landscape installation?
Drainage planning happens before any plant or paver goes in. Grading should slope away from the house at roughly a 2 percent fall. Where that is not possible, options include French drains, dry creek beds, swales, and downspout extensions. For patios and walkways, a compacted base with the right pitch keeps water moving off the surface. Landscape drainage best practices also include checking the soil's percolation rate, since heavy clay holds water and needs different solutions than sandy soil.
How long does a professional landscape installation take?
A residential landscape installation timeline depends on scope. A single planting bed or small walkway can finish in one to three days. A full front or backyard renovation with hardscaping, irrigation, and planting often runs two to six weeks, and larger projects with retaining walls or extensive grading can stretch longer. Weather, permit timelines, and material lead times all affect the schedule. A written plan with phases helps homeowners know what to expect week by week.
What are the most common mistakes in landscape installation?
The repeat offenders are poor drainage, compacted soil, wrong plant for the light or hardiness zone, and planting too close to the house or each other. Another common miss is skipping a maintenance schedule, so mulch, irrigation, and pruning get neglected in the first year when plants need it most. Choosing plants without checking mature size also leads to overcrowding within two or three seasons. Most of these issues trace back to rushing the planning and site preparation stages.
Do I need a permit for a landscape project?
It depends on what you are building. Planting beds, mulch, and most softscaping typically need no permit. Retaining walls above a certain height, structural decks, fences, and some irrigation or electrical work usually do require local approval. Rules vary by municipality, so check with your local building department before work begins. A professional installer should handle or at least flag the permit requirements during the planning phase, which keeps the project from stalling mid-installation.
What should a post-installation maintenance schedule include?
The first year matters most. A typical schedule covers watering frequency for new plantings, checking and adjusting irrigation systems, refreshing mulch, and light pruning as plants establish. Hardscape joints and drainage outlets should be inspected seasonally for settling or clogs. After year one, maintenance shifts to fertilization, weed control, and occasional re-mulching. Putting this schedule in writing at handoff prevents the slow decline that turns a new landscape into an overgrown one within a few seasons.
Can I install a landscape myself, or should I hire a contractor?
Small projects like planting beds, mulching, and simple walkways are realistic DIY jobs if you have the essential tools for landscape construction and the time. Larger work involving grading, retaining walls, drainage systems, or irrigation is usually worth hiring out because mistakes there are expensive to fix. A practical middle path is to hire a designer for the plan and do the planting yourself. Get free estimates and ask about the installation process before committing either way.